Thursday, 12 July 2012

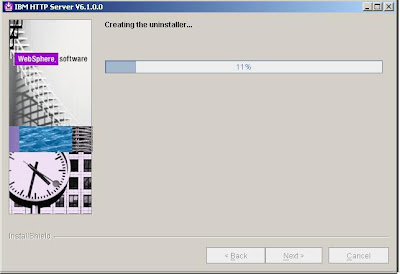
IBM IHS Webserver Installation


Follow the steps below to install and add IBM HTTP Server 6.1
to WebSphere Application Server
1) Run install.exe from installation directory. Welcome window will
appear click Next


2-a) Software License Agreement will appear select “I accept both the
IBM and the non-IBM terms”


2-b) Enter the location where you want to install IBM HTTP Server
and click next


3) Enter HTTP Port 80 and HTTP Administration Port 8008 and click
next


4-a) Select the check boxes “Run IBM HTTP Server as a Windows
Service” and “Run IBM HTTP Administration as a Windows
Service” and also select the radio button “Log on as a local
system account”


4-b) In the HTTP Administration Server Authentication window select
the checkbox and fill up User ID and password fields. Click Next


5) Select the check box to install HTTP Server plug-in and specify
the webserver name and host name of application server


6) Following window will show you installation summary before
installation begins Click next to install product.


7) After the Installation completes following window 
will appear and
shows successful installation message


IBM HTTP Server has been successfully installed and we shall now
follow the steps below to add the IBM HTTP Server to existing cell.


1) Launch the administrative console.
a) Enter User Id and Password and Login
2) Create a new unmanaged node for the Web server.
a) In the navigation tree, expand System administration and
click Nodes.
b) Click the Add Node button.
c) In the Add Node window select Unmanaged node and click
Next


3) In the Nodes window specify configuration information for the
node. Specify the name ihsnode and Host Name where you
creating Node. The Platform Type is Windows. Click OK.


4) Save the changes. The node ihsnode should be added to the list
of nodes
Node has been created now add the Web server to the configuration
In this step the Web server definition will be added to the ihsnode.


5) Add the Web server to the ihsnode configuration.
a. In the administrative console select Servers —> Web
servers.
b. Click New to add a Web server.
c. On Step 1 of creating a new Web server entry select the
node ihsnode from the drop-down menu. Specify the server
name of webserver00.
Click next


6) Specify the Web server template. Ensure that IHS is selected
and click Next


7) Specify the properties for the new Web server. Enter the
following information in the fields as provided
Field Name                                         Value
Port                                                          80
Installation location                                  <ihs_root>
Service name                                       IBMHTTPServer6.1
Plug-in installation location                          <plugin_root>
Application mapping All                              Port 8008
Username                                                         ihsadmin
Password                                                      was1edu
8) Click Next


9) On the confirmation window click finish and save the changes.
.

Sunday, 1 July 2012

How to enable JMX in websphere


By default JMX remote port is not enabled in WebSphere, We have to manually enable the JMX remote port. Here I am giving some steps to enable the JMX remote port in Websphere.
This has been done with Websphere 7.0.
After installation of web sphere application server 7.0, fallow the fallowing steps to configure Remote JMX port.
STEP 1:
Login to Admin console of the web sphere any profile(server), short cut will be available in start menu programs.
deploy the PerfServletApp.ear application if not deployed already.
GO TO Applications IN LEFT PANE CLICK WebSphere Enterpise Applications TO CHECK PerfServletApp.ear IS DEPLOYED OR NOT.
IF NOT THEN CLICK New Application UNDER Applications. BROWSE FROM WebSphere directory -> AppServer -> InstallableApps.
FOLLOW THE STEPS.
STEP 2:
Enable the PMI Data and set all the statistics enabled.
GO TO Monitoring and Tuning IN LEFT PANE CLICK ON Performance Monitoring Infrastructure(PMI) IN CONIFGURATION TAB ENABLE THE PMI AND
SET THE ALL STATISTICS. ALSO SET THE ALL STATISTICS IN Runtime Tab. SAVE THE CHANGES.
STEP 3:
Set the generic jvm argument = -Djavax.management.builder.initial= -Dcom.sun.management.jmxremote
in Severs -> Server Types -> WebSphere Application Servers
shows the servers list. click on the server you want.
In the right pane -> Server Infrastructure -> Java and Process Management  click on Process definition, again in Additional Properties of Configuration tab
click on Java Virtual Machine. put the -Djavax.management.builder.initial= -Dcom.sun.management.jmxremote in Generic Jvm Argument field.
and save changes.
STEP 4:
To enable the JMX remote port open the below properties file and add the code below.
FILE : WebSphere directory \AppServer\java\jre\lib\management\management.properties
CODE :
com.sun.management.jmxremote.port=9001
com.sun.management.jmxremote.ssl=false
com.sun.management.jmxremote.authenticate=false
STEP 5:
SAVE THE MASTER DATA AND STOP THE SERVER AND START THE SERVER TO LOAD THE CHANGES……

Verify the JMX is enable or not
If you have a default Websphere installation, the JNDI port number will likely be 2809, 2810, ... depending on how many servers there are installed on one system and the specific one you want to connect to. To be sure, when starting Websphere, check the logs, as it will dump a line like
0000000a RMIConnectorC A   ADMC0026I: The RMI Connector is available at port 2810

If you don't get this line, open the Websphere admin console and go to
Application servers > server1 > Administration Services > JMX connectors
to see if you need to add or change the config.
Second important bit of information is that the following JAR is always needed when doing JMX with the serverin Java dir:
com.ibm.ws.admin.client_6.1.0.jar